February 5, 2016
by Lauren Nofi

In the fifth in a series of weekly blogs, IAFS/Learn intern Lauren Nofi writes about progress in Cutting 6 and post-ex work at the Blackfriary, and field trips to Monasterboice and Mellifont.

Felicitations! We’ve been busy, busy, busy, finishing our plans of the southeast of Cutting 6. In addition, post-ex has been handling the processing of last summer’s animal bone, and managing the material from our early cleaning of the trench. I had promised previously to talk a little bit more about planning, so get ready for a whirlwind tour of how we plan!
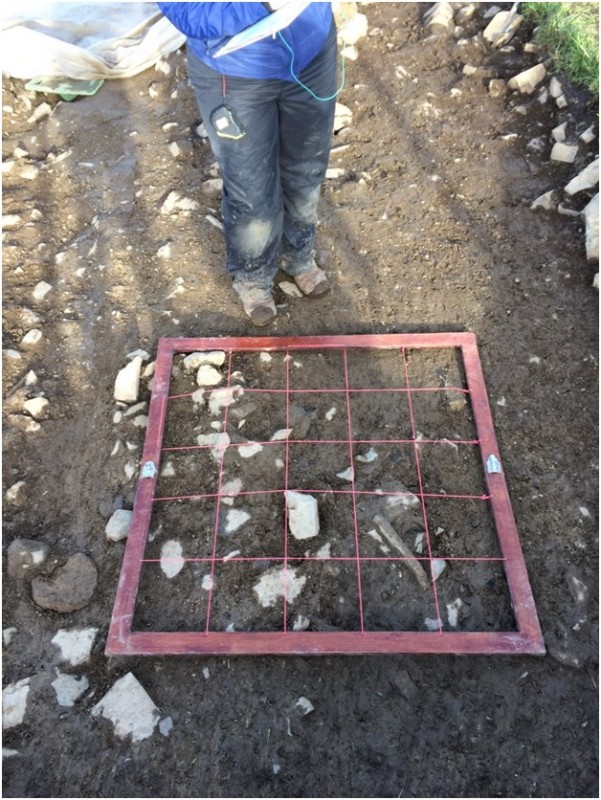
We use a lot of simple tools to plan: long measuring tapes, hand tapes, plumb bob, planning frame, a 2H pencil and eraser, and a pre-printed planning grid on a translucent material called permatrace. Just what are all these bits and why do I need them? Everything we plan is to scale, so the tapes, plumb bob, planning frame are all how we can ensure what we see on the ground is correctly depicted on our drawing sheet.
A plumb bob is simply a weight tied to a string which allows us to use gravity to find a perfectly vertical line. (Fun fact: The word “plumb” comes from the Latin word for lead, “plumbum,” which is the same root of our word “plumbing.”)
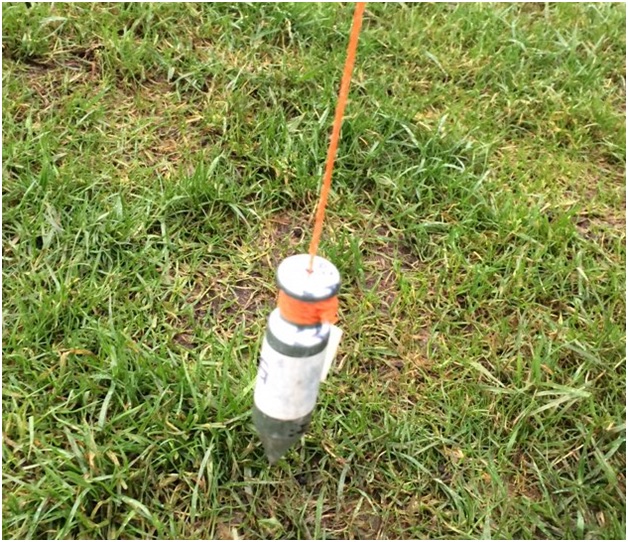
A plumb bob. But he prefers to be called Robert.
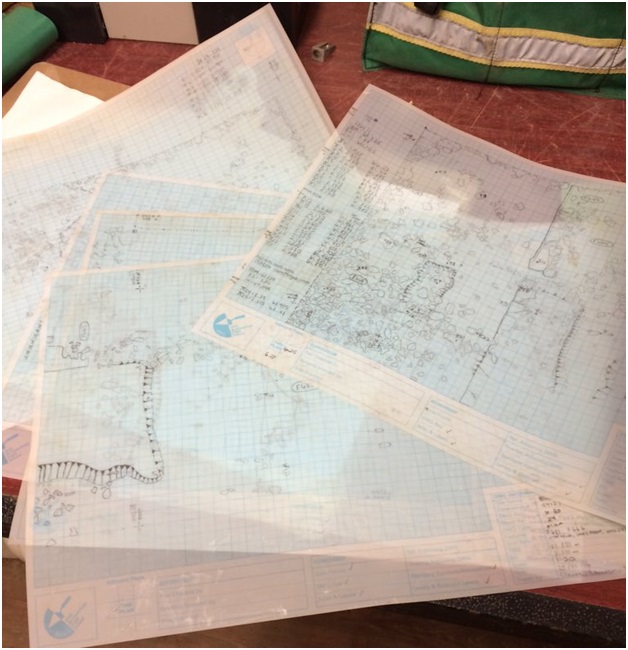
A 2H pencil is a harder pencil than what we usually use for writing, and this allows crisp lines slightly lighter than a common pencil. Our drawing sheets already have a grid, which allows us to use multiple scales, depending on what we are drawing. For a plan, we use a 1:20 scale, which means for every 1 centimetre on our page, we are depicting 20 centimetres of the earth. These squares on the grid are outlined and have even tinier squares inside them.
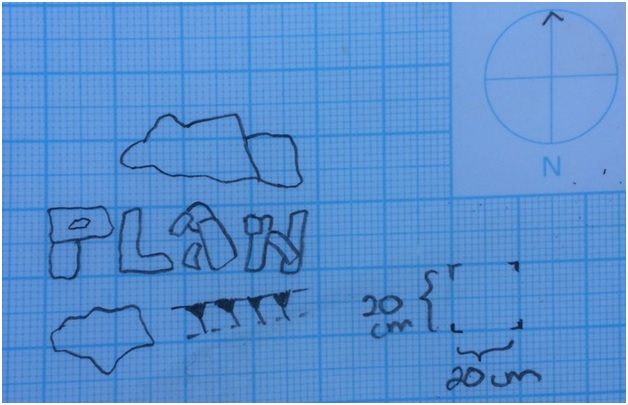
A sample of our planning sheet and example of scale. This is not a real plan, as there are no rocks which conveniently spell out “Plan” anywhere in our trenches.
Our planning frame, similarly, has twenty-five squares each with 20 centimetre sides. One square in the frame represents one square of 10 by 10 tiny squares in our drawing, or one outlined square.
And you may be thinking this going to be a task for the artsy among us. Fear not, even I, the Worst Artist in the World, have completed many a successful plan. There are two main ways to plan an area, and both allow you to accurately and precisely plot anything you encounter on an excavated surface. The first way is to use a bit of the old maths graphing, where you find an object, such as a lone stone, and measure its position along an x and y axis. The second method involves the planning frame, and it is especially useful when planning a spread of stones, for example. Since each box of the frame will correspond to an outlined square on the drawing sheet, the process is as simple as one of those old colouring book exercises to move a picture from one page to another: you draw each box individually to create a larger picture. Voila! You have a to-scale plan of an archaeological area! Later, we will match up individual drawn plans both physically and virtually: we scan them into a computer program so we can align them all to get a view of several adjacent areas.
Anyway in the middle of all this planning, we had another wonderful field trip! We saw Monasterboice, a monastic site founded over 1600 years ago, as well as Mellifont Abbey, a 12th-century Cistercian abbey.
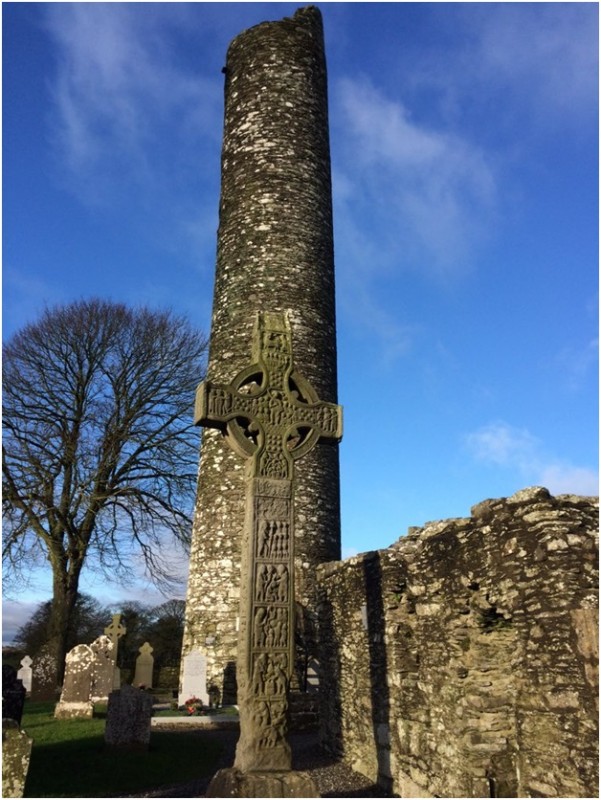
Monasterboice is situated in what centuries ago would have been a monastic enclosure, though now only a churchyard remains surrounding two small ruined churches and a round tower. The site features three extant high crosses, two of which are intricately carved. Muiredach’s Cross towers over nearby headstones, depicting biblical scenes on both sides. The entire body of the cross, save for the very top, is all carved from one block of granite.
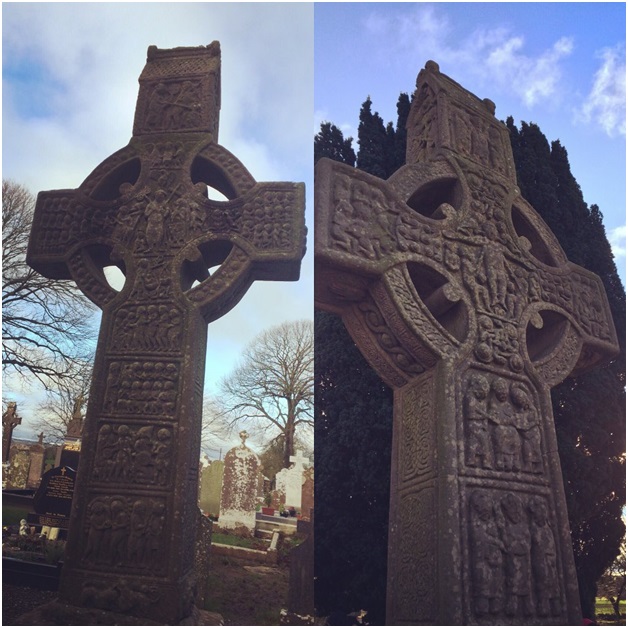
Muiredach’s Cross (front and back), named after a 10th-century abbot. Note the heavy relief and extensive ornamental knotwork.
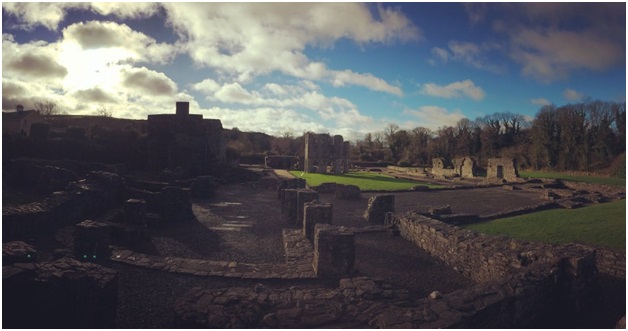
Mellifont Abbey was the very first Cistercian abbey in Ireland. “Mellifont” comes from the Latin for “honey fountain,” though I’m not sure any further of the origin of such a delicious epithet. The abbey’s layout is still very evident and can provide a lot of information about the fusion of Irish and French architectural styles employed in its construction.
Two structures were immediately investigated by our students. One is the still-roofed chapter house. This building, like our chapter house in Cutting 6, would have served as a meeting place for the monks. A bench runs along the inner wall, just like our chapter house. Some original tiles are still in place! There was also a round façade in the cloister garth for a “lavabo” (from the Latin “I will wash”) where monks would have had access to water for cleaning themselves before prayer.
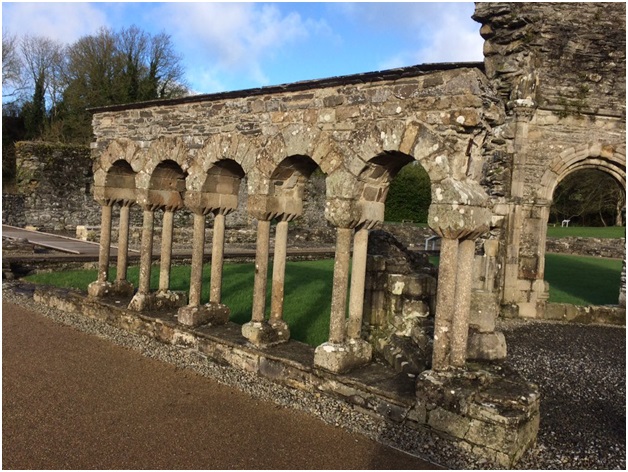
Once again, the sites we visited continued to shape our perception of our own site’s prime. Yet again we see architecture which, although stylistically different, underscores things like the scale of the church and cloister on our site. Lastly I just wanted to share another picture of a cloister wall, this time at Mellifont Abbey. I find cloister construction and masonry fascinating, and since I took a similar photo at Bective, I decide to take a photo of Mellifont’s double-column range.
Finally, finally… Here are a few more photos, taken by IAFS supervisor, Dr Ciaran.
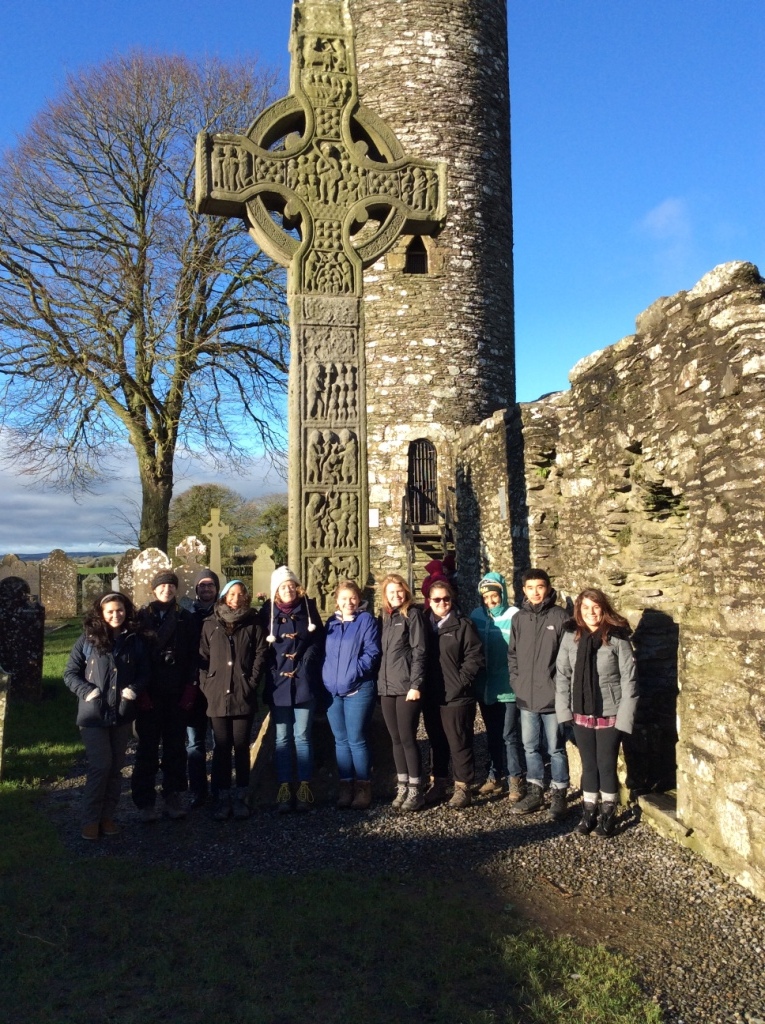
The gang at Monasterboice
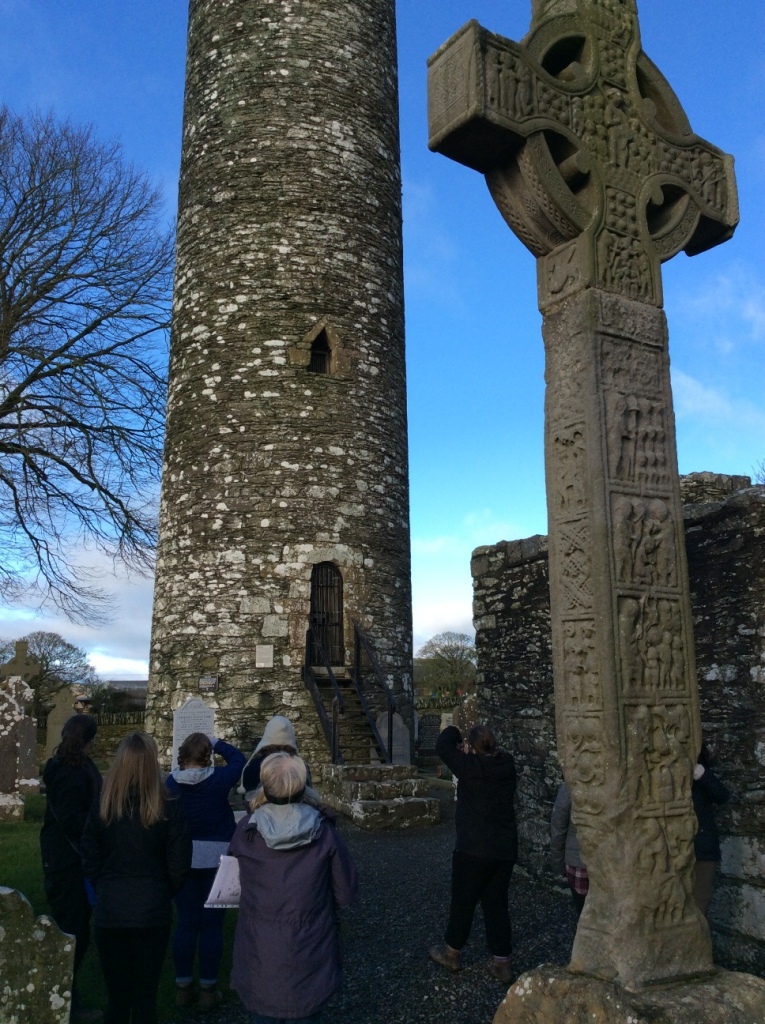
Assessing the impressive round tower at Monasterboice
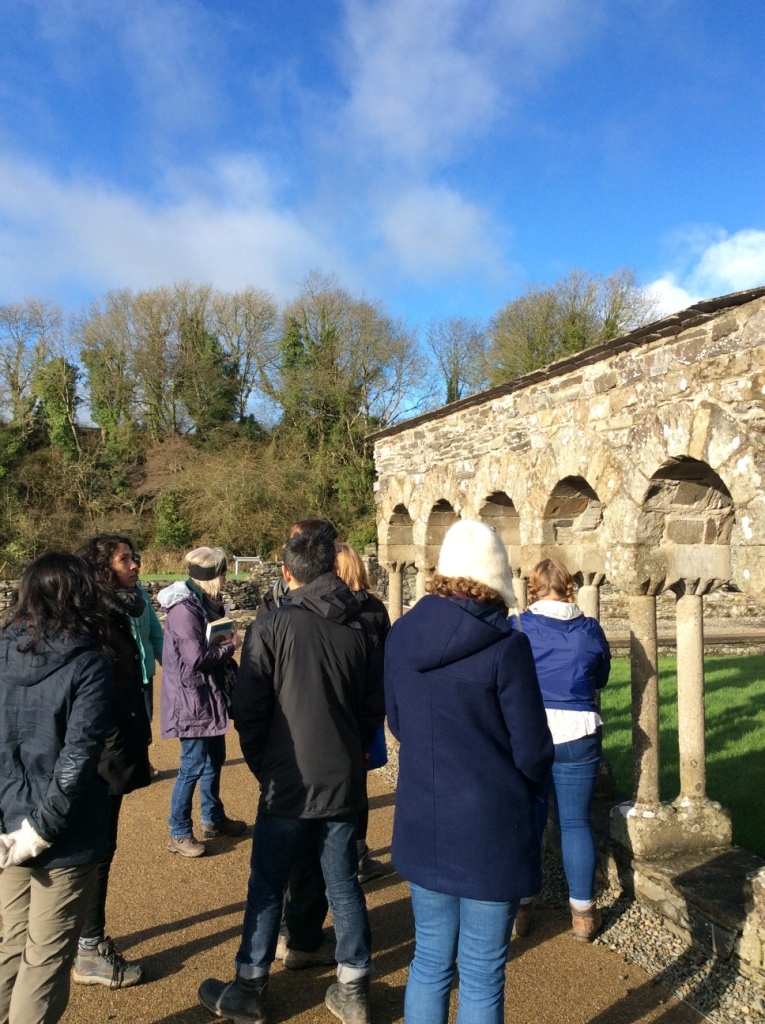
Our cloister was much more impressive than the one at Mellifont!
So long until next week!